Many, many people love sourdough bread. Eating it is one thing, though. Getting started with baking sourdough bread can be daunting. Not only that, it can be extremely expensive regarding tools, so I decided to make this recipe that only requires tools you already have in your kitchen. This is my easy sourdough bread recipe.
We, sourdough bakers, are obsessed. With our starters, with our flours, with our tools and gadgets. We’ll invest large sums of money into all of that stuff.

This recipe is designed for people that want to try out baking sourdough bread but without investing a big part of their hard-earned cash into those things.
This means that you will only need tools that you already have in your kitchen, a bag of bread flour from your supermarket, some water from your tap, and some table salt.
You will need an active starter, so go read here if you want to make your own.
If you are just here for the recipe, you can press the button underneath to be automagically transported to the recipe:
Jump to Recipe Jump to VideoWhat tools are needed in this easy sourdough bread recipe?
- Some mixing bowls.
A medium one for the dough, probably the bulk fermentation, and two small ones for the fridge retard. You could probably get by with one mixing bowl if you halve the recipe if you’re low on bowls. - A measuring cup.
For this recipe, you can use either a 1 dl measuring cup (if you prefer metric) or a ½ cup measuring cup. - A teaspoon.
I use a measuring teaspoon, but you can get by with a regular old teaspoon. - Tea towels.
Three. One, to cover your bowl while the dough is being developed, and two, to put in the smaller bowls while retarding. - A heat-proof dish.
A rectangular one. It should fit a rolled-up towel. - A towel.
When you roll it up, it should fit in the heat-proof bowl. Funny, huh? - A sharp knife.
- An oven with a baking sheet.
Volumetric salt conversion
If you weigh your salt, it doesn’t matter what kind of salt you use (and no, it doesn’t matter what salt you use), but if you are using volumetric measurements, there is a difference.
The problem is that the larger the grain of salt is, the more room for air there is in between the individual grains.
To get the same amount of salt in your finished bread, the larger the grain, the more teaspoons (or tablespoons or whatever) you will need to get the same amount of salt by weight.
I made this conversion chart for this recipe. It’s divided into two tables, one if you use a 1 dl measuring cup, and one if you use a ½ cup measuring cup.
This table is for when you make the recipe with a 1 dl measuring cup:
| 14 grams salt (1 dl measuring cup) | Teaspoon |
|---|---|
| Table salt | 2 teaspoons |
| Kosher salt | 2¼ teaspoons |
| Sea salt | 3 teaspoons |
| Maldon salt | 4¼ teaspoons |
This table is for when you make the recipe with a ½ cup measuring cup:
| 17g salt (½ cup measuring cup) | Teaspoon |
|---|---|
| Table salt | 2½ teaspoons |
| Kosher salt | 2¾ teaspoons |
| Sea salt | 3¾ teaspoons |
| Maldon salt | 5¼ teaspoons |
Volumetric measurements in baking
Normally I am a huge proponent of using weight instead of volumetric measurements when baking. Just because it’s more precise.
A cup of hard-packed flour weighs much more than a cup of sifted flour, which means you can go quite wrong with the proportions when measuring using volume.
But here are my assumptions:
1 dl of bread flour weighs 61 grams.
I checked it by weighing out 20 cups of bread flour and calculated the average.
1 dl of water weighs 100 grams.
This is only true at 4°C/39.2°F, but the change is minimal at higher temperatures. At 21°C/70°F, 1 dl of water weighs 99.802 grams. Not really enough to bother.
1 dl of stirred-down sourdough starter (100% hydration) weighs 100 grams.
If you use ap-flour or whole grain, it may a bit more or a bit less. It’s fine.
It’s very important to stir it down, or else you may get a lot less starter than you intend.
The dough in this easy sourdough bread recipe
Vitals
| Total weight | 1346 grams |
| Pre-fermented flour | 6.4% |
| Hydration | 70.3% |
| Yield | 2 small boules |
The dough
The dough in this simple artisan sourdough bread recipe is measured by volume, which approximates the dough.
100% of the flour is supermarket bread flour, which would be a relatively easy flour for most people.
If you can’t get that, get the best all-purpose flour and spike it with vital wheat gluten, so you have 13% protein.
Use my vital wheat gluten calculator to determine how to mix your new high-protein flour.
| Weight | Ingredient | Baker's Percentage |
|---|---|---|
| 732g | bread flour | 100.0% |
| 500g | water | 68.3% |
| 100g | starter (100% hydration) | 13.7% |
| 14g | salt | 1.9% |
If you want to play around with the formula or scale it, you can play with my bread calculator. Just remember that the flour should be divisible by 61, water and starter should be divisible by 100, and salt should be divisible by 7.
The conclusion of this easy sourdough bread recipe
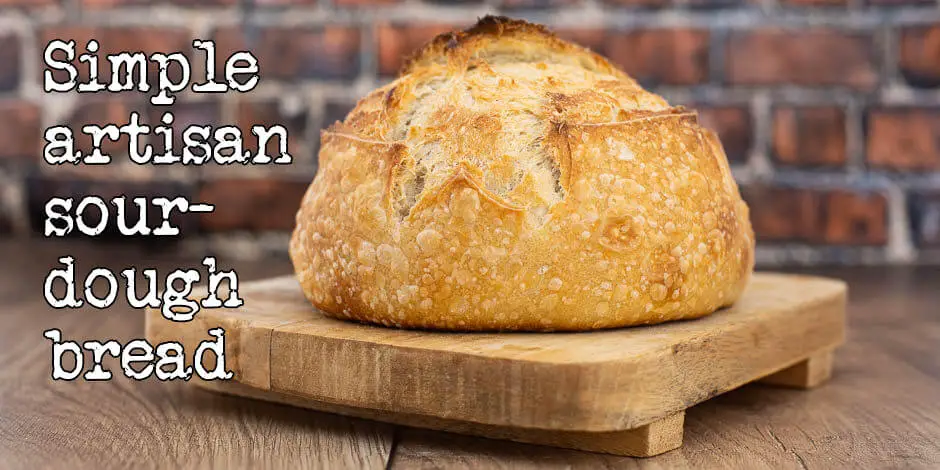
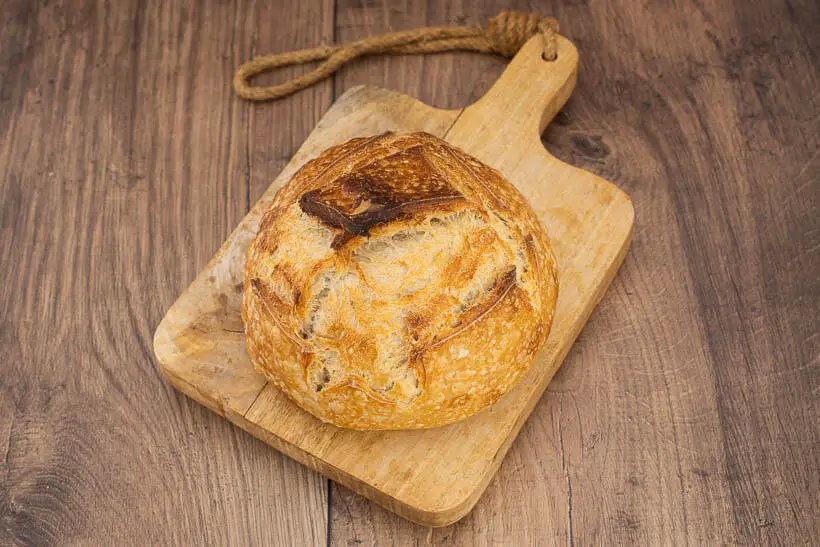
This is a beautiful sourdough bread, albeit not super complex tasting.
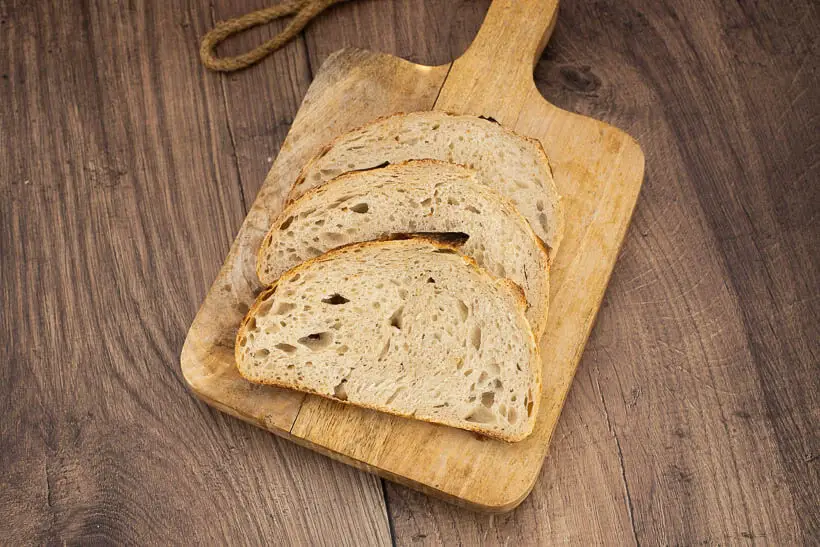
The crust is super crispy, and the crumb is nice and chewy. It’s not overly tangy, but enough to make your mouth water.
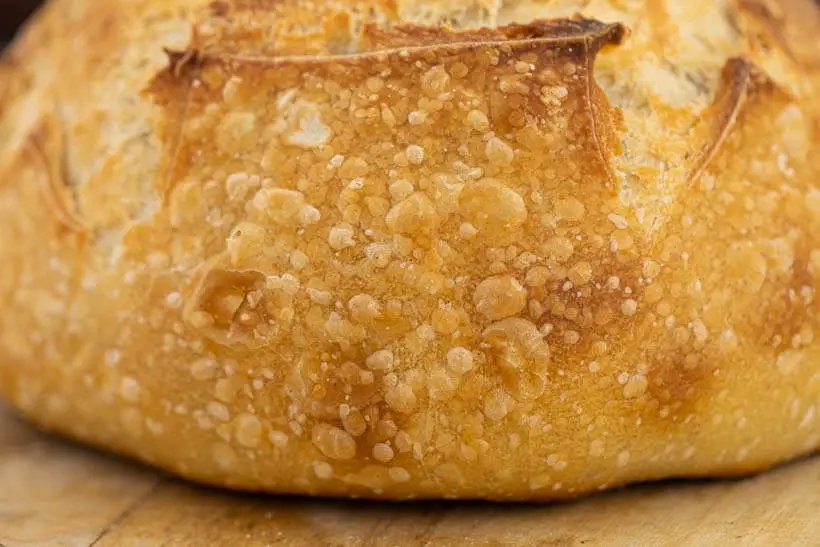
If perfectly fermented, this recipe can bring artisan sourdough bread to anybody who wants to give it a go.
It doesn’t require anything that you don’t already have in a normally stocked kitchen.
Come on. Give it a go!
Please share this easy sourdough bread recipe on social media
This is my recipe for a simple artisan sourdough bread. If you like the recipe, please consider sharing it with like-minded bread lovers on social media.
If you make it and post it on Instagram, please tag me as @foodgeek.dk so I can see it. That would make me very happy.
Simple artisan sourdough bread
Equipment
- measuring cup
- teaspoon
- bulking container
- 2 tea towels
- a heat proof dish
- towel
Ingredients
- 12 dl bread flour
- 5 dl water
- 2 teaspoon table salt
- 1 dl sourdough starter stirred down
Instructions
Mix dough
- Add all ingredients to a medium bowl. When measuring out the flour, make sure you don't compress the flour.
- Mix everything until no dry spots remain.
- Leave to rest for an hour.
Bulk fermentation
- Do three sets of stretch and folds spaced out by 30 minutes. If you are not sure how to do this, watch the video.
- Do a windowpane test, and if it passes, move the dough to a bulking container where you can easily monitor the growth of the dough.
- If it doesn't pass, add another set of stretch and folds and then move it to the bulking container.
- Leave the dough until it has grown by 25%. Another way of saying it is that the dough should grow to 125%
Divide and pre-shape
- Divide the dough into two equally sized pieces.
- Preshape the dough by pulling the dough from each corner (north, east, west, and south) up and over the dough.
- Then flip the dough over and pull it over the table with your hands behind the dough. The top of the dough should be pulled down and in under the dough, creating tension on the top of the dough. Keep going until the dough is pretty taut.
- Once both pieces are shaped let them rest uncovered on the counter for 20 minutes.
Final shape the dough
- Once the 20 minutes are up, proceed to shape each dough ball the way you pre-shaped them.
- In two small bowls, put a tea towel and then move the final shaped doughs into a small bowl each so that the top of the dough is facing downwards.
- Cover the dough with the remaining tea towel and put them both in the fridge to retard for at least 8 hours up to 48 hours.
Bake the bread
- Heat your oven to 260°C/500°F with a heat-proof dish on the bottom and a baking sheet around the middle. It's essential to turn off the fan assist.
- Once the oven is heated, boil a kettle of water.
- Roll the towel so it can fit into the dish. Open the oven, place the towel in the heatproof dish and pour over all the water. Make sure the entire towel is wet.
- Close the oven and let the oven steam for about 20 minutes.
- Then open the oven, take the hot baking sheet from the oven and place it on something heatproof on your counter (I used a cutting board).
- Place both loaves onto the baking sheet. Make sure there's enough room between them to grow when you bake them.
- Score them using a sharp knife. I used a paring knife.
- Put the sheet into the oven and let it bake for 20 minutes.
- Then open the oven door and remove the steaming pan.
- Turn down the oven to 230°C/450°F and bake for another 20-25 minutes until the bread is done to your liking.
- Remove the sheet from the oven and let it cool a bit.
- Then remove the bread from the baking sheet and let them cool on a rack (one should come with your oven).


