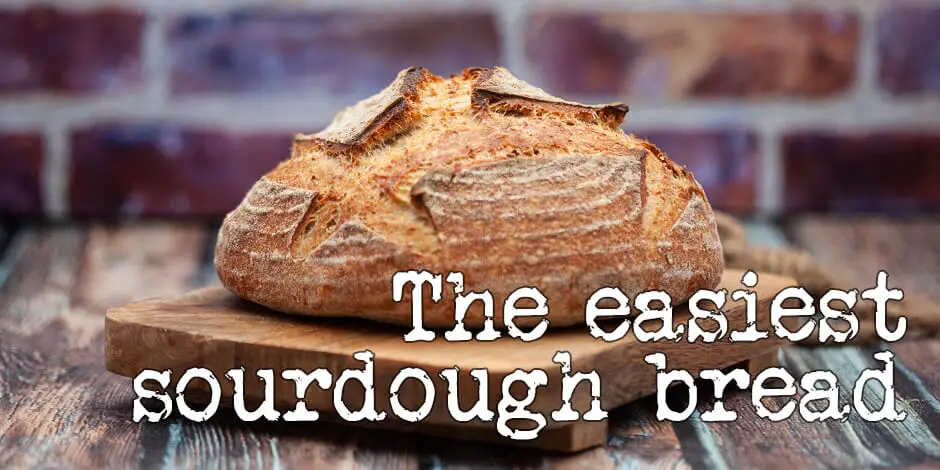
Making sourdough bread involves a lot of different techniques and a long list of things to do. Looking at the dough, touching it, waiting for it, stretching and folding it, and a lot of other things. Sometimes you have other things to do, but you still want a fantastic sourdough bread with a holey crumb and a dark, crispy crust. Here is the solution. This is my recipe for the world’s easiest sourdough bread.
I love to bake. Cakes are fun, but bread… bread is everyday food. A day doesn’t go by, without me eating bread. My favorite is sourdough bread. The crunch, the tangy and well-developed taste. Yum.
If you are just here for the recipe, you can easily jump to it by pressing this button:
Go to recipeI’ve loved baking since I was a child
I’ve been baking since I was nine years old and I found my mother’s blue baking book. This is a book that was probably in every home in the 1970s in Denmark. One day after school I grabbed the book and followed the recipes. I don’t remember what recipe it was, but I do remember my Mom being excited about coming home to something home-baked and possibly less excited about the near-exploded kitchen.

Since then I’ve baked a myriad of things. Layer cakes, bundts, cakes, muffins, and buns for my and my kid’s birthdays. Every kind of bread for everyday use. The last year I’ve become pretty obsessed with sourdough and I’ve taught myself to make the most delicious bread with just three ingredients (flour, water, and salt).
You need an active sourdough starter
To bake this bread, you will need to have an active sourdough starter. You are in luck though, because I have made my own guide on how to make your own sourdough starter right in your own kitchen.
Why ‘the world’s easiest sourdough bread’?
The biggest problem for me, when it comes to baking sourdough bread, is that I have to use an entire day to make one bread. It’s super nice and meditative, but I don’t always have that kind of time to spend.
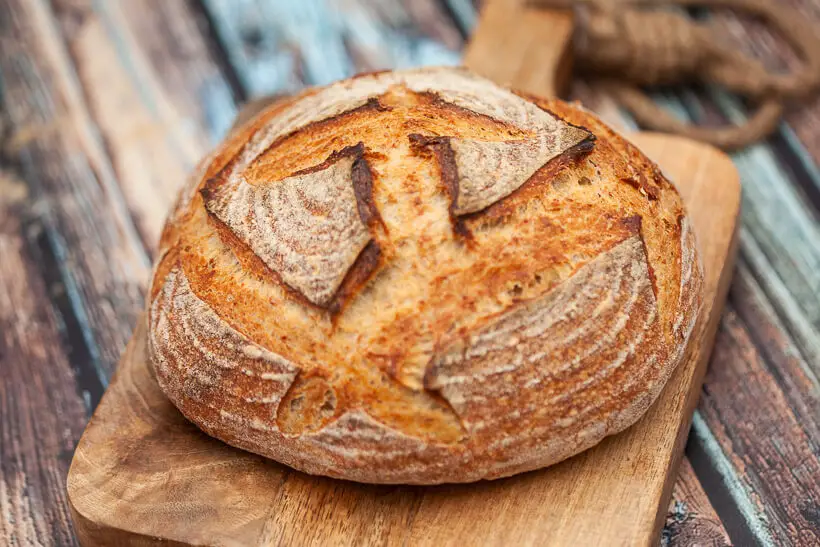
That is the reason that I’ve developed a recipe for the world’s easiest sourdough bread. It requires about 20 to 25 minutes of active work. The rest of the time the dough will just be hanging out on the kitchen counter, in the fridge or in the oven.
The tools you need to make the world’s easiest sourdough bread
When you create things you need tools. I’ve assembled a list of tools you need when you create sourdough bread.
Ad links! Most of these links will give me a bit of commission if you buy them. If you are not interested in doing that, find the tools using your favorite search engine.
As a minimum you will need:
- A good bowl – This bowl is incredibly beautiful, but whatever you have in your kitchen that is big enough to hold the dough
- A bench scraper – This is used to move the sticky dough around and also to help shape it
- A dutch oven – You need a dutch oven (basically a pot that can go into the oven), because then you won’t have to have to make steam the oven because the bread will essentially be steaming itself
- A lame – You need a super sharp knife to score the dough. This one uses a razor blade that can be replaced
- A good oven – Preferably one that can get super hot. I have one that can go to 300°C/572°F that can also steam, which is quite basic in features, because I want to do everything manually
The formula of the world’s easiest sourdough bread
This is a pretty simple bread. 80% high-protein flour for good oven spring, 20% whole-grain wheat flour for delicious taste, and 75% hydration for lots of holes in the crumb.
| Weight | Ingredient | Baker's Percentage |
|---|---|---|
| 100g | sourdough (100% hydration) | 10.0% |
| 760g | bread flour | 76.0% |
| 190g | whole-grain wheat flour | 19.0% |
| 700g | water | 70.0% |
| 22g | salt | 2.2% |
If you want to change the formula, you can do it here in my bread calculator.
Great sourdough bread takes time
There is no doubt. Great bread takes the time that great bread takes, but it is absolutely possible to cut down on the amount of work.
My regular method for making sourdough bread consists of a lot of steps:
- Create and mature a levain (3-4 hours)
- Autolyse (½-1 hour)
- Mixing the dough (20 minutes)
- Bulk fermentation including stretch and folds (3 hours)
- Diving and shaping the dough (30 minutes)
- Retard (8-10 hours)
- Baking (1½-2 hours)
All that will be replaced by these easy steps:
- Mixing the dough (10 minutes)
- Bulk fermentation on the kitchen counter (8-10 hours)
- Dividing and shaping (25 minutes)
- Quick retard while the oven is heating (1 hour)
- Baking (1½-2 hours)
That means that you can just mix the dough at night and shape and bake it the next morning.
All you need is one advanced technique
The only advanced technique you need for this recipe is shaping the dough. In this video, I use my hands to fold the dough, but when you get to higher hydrations you should use your bench scraper.
You can get a good idea of how to do it here:
The conclusion of the world’s easiest sourdough bread
Compared to how you create classic sourdough bread, this is an extremely easy recipe. It really delivers in both crust, crumb and taste.
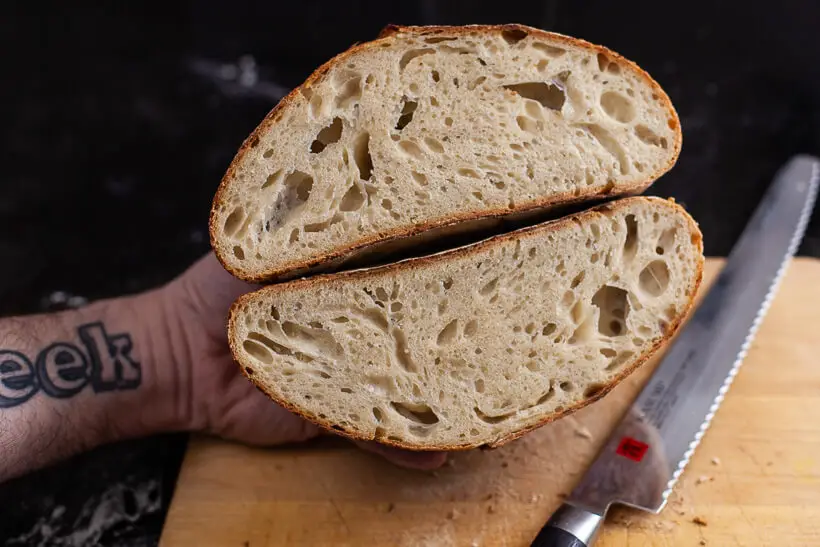
It is not going to be the only sourdough bread in my arsenal, but it is really great to have a great bread that can be done with a minimum of work and time
The active time investment is really so much lower than the regular sourdough bread, so it will be easy to find time to bake on a more regular basis now.
Please share on social media
This is my recipe for the world’s easiest sourdough bread. I hope you will try to make it. If you post it on Instagram please tag med as @foodgeek.dk so I can see it. That would make me very happy.

The world’s easiest sourdough bread
Ingredients
- 760 grams bread flour
- 190 grams whole wheat flour
- 700 grams water
- 100 grams sourdough starter
- 22 grams table salt
Instructions
Ready your sourdough starter – in the morning
- Feed your starter, so it is ready to be used in the evening.
- You need enough starter to use 100 grams and something to continue your sourdough starter.
- I usually take 50 grams of unfed starter, 100 grams of bread flour, and 100 grams of water.
Make the dough – in the evening – about 21:00/9 p.m.
- Put 100 grams of starter and 700 grams of water in a big bowl. Mix until the starter is dissolved.
- Add 760 grams of bread flour, 190 grams of whole-grain whole-grain wheat flour, and 22 grams of table salt
- Mix the dough with your fingers until it is well mixed.
- Put a wet dishcloth over the top and leave it until the following day.
- Note that the recipe assumes your kitchen to be about 21°C/70°F. If it is a lot warmer, the dough may be ready sooner, and if it's a lot cooler, it might take much longer.
- The dough should be about doubled in size and jiggle slightly when wiggling the bowl.
Divide and preshape – next morning – between 6:00/6 a.m. and 8:00/8 a.m.
- Pour the dough onto an unfloured table and divide it in two using your scraper.
- Grab a piece of dough and push your scraper under the front of the dough. Lift it and fold it over the dough away from yourself.
- Repeat from the top, from the left, and the right. That creates tension on the dough that is facing the table.
- Using your scraper, in one swift motion, push the scraper underneath, lift the dough and turn it upside down.
- Put your scraper behind the dough and drag it towards yourself. Use your other hand to guide the dough so that the front of the dough is pushed underneath the ball, thus creating tension on the top of the dough. To release the scraper, pull it backward quickly.
- Now put the scraper in front of the dough and push forward and turn it around until the scraper is behind the dough again. Repeat these two steps until you have a suitable ball.
- Repeat with the other piece of dough and let the dough balls rest on the kitchen table for 15 to 20 minutes.
- While waiting, mist your bannetons and sprinkle with rice flour.
Shape the dough and refrigerate
- Shape the dough as described above, making sure the surface is very tight.
- Using the scraper, flip the dough into the banneton. Seal it using a plastic bag and put it in the fridge.
- Repeat with the other dough ball.
Bake the bread
- Put a dutch oven in your oven and turn the oven on to 260°C/500°F.
- Let the oven heat for at least one hour.
- Cut two pieces of parchment paper that should be big enough to fit over your bannetons. If you use a regular dutch oven, you may want to make much longer pieces as a sling to lower the dough into the pot.
- Take a banneton from the fridge.
- Put the parchment paper over the banneton, put your peel on top and flip it
- Lift the banneton off the dough carefully. Score the bread using a lame or a very sharp knife.
- Open the oven and place the dough inside the dutch oven. Put the lid on and close the oven.
- Bake for 20 minutes with the lid on top of the dutch oven.
- Open the oven and take the lid off. Close the oven.
- Lower the temperature to 230°C/450°F and bake another 25 to 30 minutes until the crust is dark and crunchy. Don't be afraid of the edges getting a bit dark
- Take the bread out of the oven and place it on a wire rack.
- Turn the oven up to 260°C/500°F and repeat with the other bread once the oven is warm again.
- Let the bread cool to room temperature before you cut into them.


