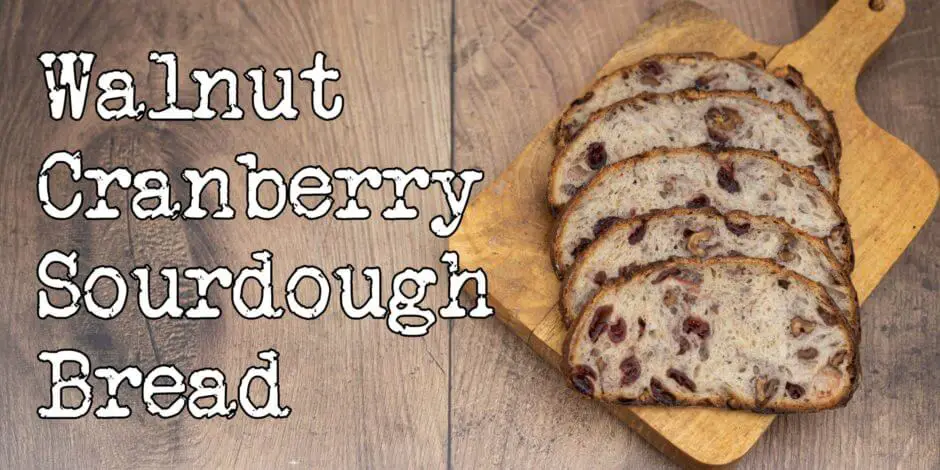
Cranberry walnut bread is a staple in the American kitchen. It’s a delicious cake-like bread filled to the brim with ripe cranberries and walnuts. The original version is not so much a loaf of bread, but more of a cake. While some more bready versions exist, they’re usually made with baker’s yeast. Well, this is about to change. This is my recipe for walnut cranberry sourdough bread.
If you are just here for the recipe, you can press the button underneath to be automagically transported to the recipe:
Jump to Recipe Jump to Video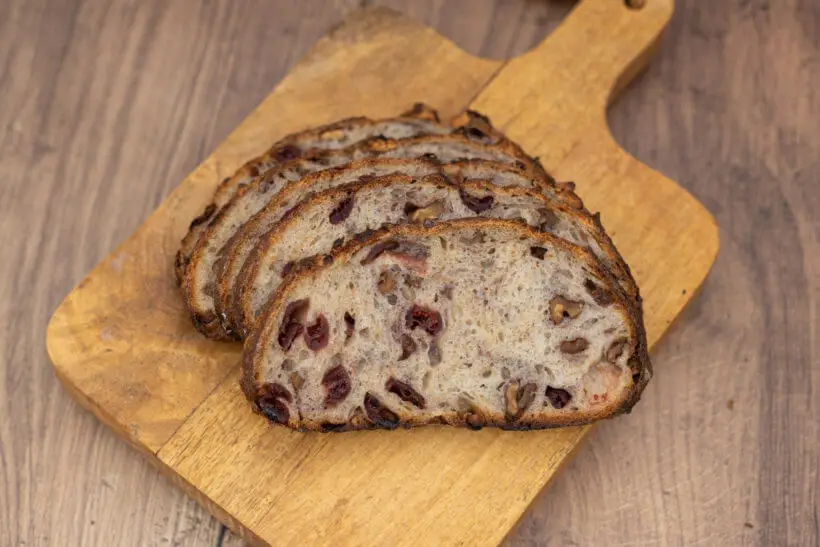
The original cranberry walnut bread
The original cranberry walnut bread is a so-called quick bread. Much like banana bread or zucchini bread.
Quick bread is a cake-like bread made using chemical leaveners like baking powder and baking soda. This type of leavening gives you a very delicate and fine crumb structure and usually, you’d use all-purpose flour or cake flour to help this along.
Some more bread-like versions exist, but they are mostly made with baker’s yeast.
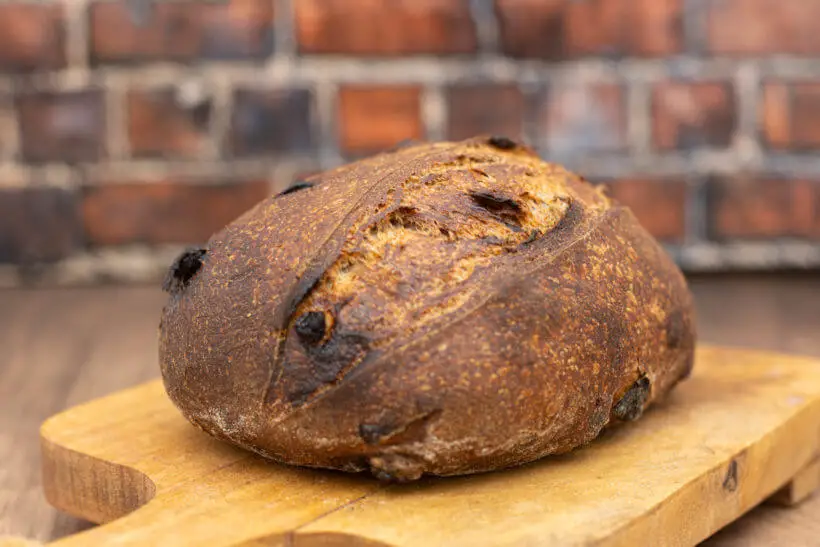
My bread in this recipe makes sourdough bread with bourbon-soaked cranberries and toasted walnuts, but with all the tell-tale signs of sourdough bread: crispy crust, soft but a bit chewy crumb, and excellent well-developed taste.
The formula in this walnut cranberry sourdough bread recipe
Vitals
| Total weight | 1400 grams |
| Pre-fermented flour | 9.1% |
| Hydration | 75.0% |
| Yield | 2 small loaves |
The dough
The flours in this recipe are selected for as much oven spring possible and for a delicious taste.
Bread flour makes the bulk of the flour. 80% of the flour is bread flour. You should choose the best tasting bread flour that you have available.
The remaining 20% consists of whole-grain spelt and whole-grain rye. The nutty and sweet taste of the spelt pairs perfectly with the malty, and slightly earthy flavor of the rye. The combination really gives this bread character.
If you don’t have spelt or rye, you can substitute with any other whole grain that you like. If you prefer to do a 100% bread flour loaf, you may want to consider using lower hydration, dependent on how absorbent your bread flour is. Just note that the bread won’t be nearly as tasty.
The inoculation is 20%, which under normal circumstances gives me a fermentation time of around 3 hours in my proofer set to 30°C/86°F, but the addition of oil tempers the fermentation a bit and it took me around 4 hours. Note that these are just to give you an idea of how long of fermentation, you should as always go for an increase in dough size.
| Weight | Ingredient | Baker's Percentage |
|---|---|---|
| 489g | bread flour | 80% |
| 61g | whole grain spelt flour | 10% |
| 61g | whole grain rye flour | 10% |
| 443g | water | 72.5% |
| 122g | starter (100% hydration) | 20% |
| 93g | toasted walnuts | 15.2% |
| 25g | walnut oil | 4.1% |
| 13g | salt | 2.1% |
The soaker
A soaker is when a liquid is added to seeds or other inclusions to soak up as much of the liquid as they can. The liquid should be discarded before adding it to the dough.
The liquid in the soaker does not count towards the hydration, because when it’s added to the dough, the inclusions have already soaked as much liquid as they can. Otherwise, it could actually lower the perceived hydration of the dough.
I use bourbon to soak my cranberries. It’s so little that goes into them that I wouldn’t worry about serving it to anybody, but if you for some reason want to avoid alcohol, using orange juice could be delicious, or you can just use water.
| Weight | Ingredient | Baker's Percentage |
|---|---|---|
| 93g | dried sweet cranberries | 15.2% |
| 80g | bourbon | 13.1% |
The formula
If you want to play around with the formula, change hydration, inoculation, and quantity, you can do so here in my Bread Calculator.
The conclusion of this walnut cranberry sourdough bread recipe
So what does this bread set out to do?
- Make a sourdough version of a cranberry walnut bread, more bready, less cakey.
- Get the absolute best taste out of the inclusions.
- Get all the great things that sourdough can do over commercial yeast.
So does this bread deliver?
Yes, in droves.
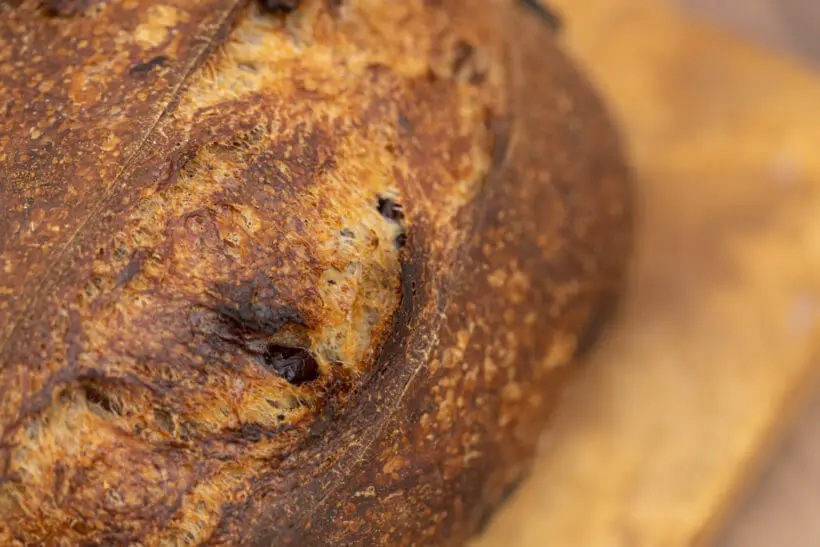
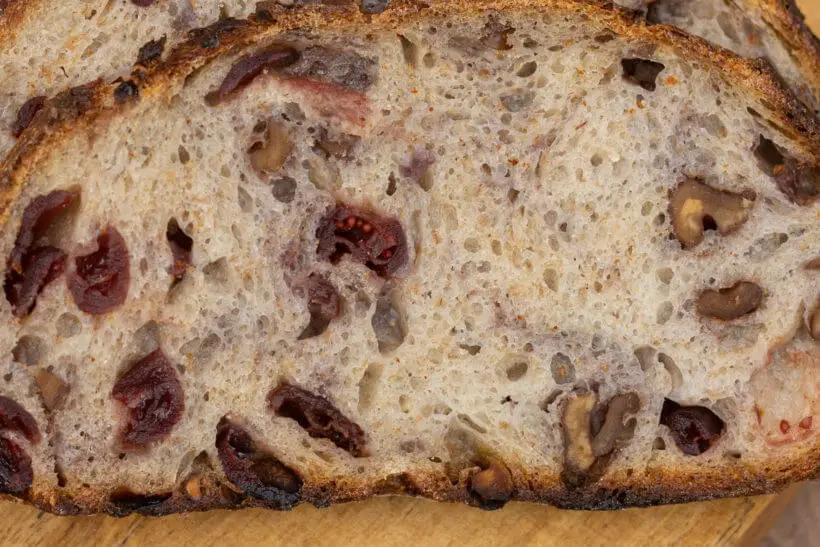
It’s perfect sourdough bread, not cakey at all, but bringing all that a proper fermentation of flour does. The crust is crispy, the crumb is soft, and the taste of the actual bread is nothing short of awesome.
The combination of cranberries and bourbon is wonderful, but also orange juice is a great pairing for cranberries. Toasting the walnuts brings out the earthy notes and tempers the bitterness of the nuts.
This is wonderful bread. Serve it with a healthy helping of wonderfully cultured butter and you’ll be in bread heaven.
Please share this recipe for walnut cranberry sourdough bread on social media
This is my recipe for walnut cranberry sourdough bread. If you like the recipe please consider sharing it with like-minded bread lovers on social media.
If you make it and post it on Instagram, please tag me as @foodgeek.dk so I can see it. That would make me very happy.
Walnut Cranberry Sourdough Bread
Equipment
Ingredients
Dough
- 489 g bread flour
- 61 g dark rye flour
- 61 g spelt flour
- 122 g sourdough starter
- 444 g water
- 93 g toasted walnuts
- 23 g walnut oil
- 13 g salt
Soaker
- 93 g dried sweet cranberries
- 80 g bourbon
Instructions
Mix dough
- Add everything for the dough, not including the walnuts, into a bowl.
- Mix everything with your hands until no dry flour remains.
- Leave the dough covered for an hour to develop the gluten.
Prepare the inclusions
- Add cranberries and bourbon to a small bowl and leave them to infuse until you need them. If you want this recipe to be alcohol-free, use warm water instead.
- Heat the oven to 180°C/350°F using fan assist and line a baking sheet with baking paper.
- Toast the walnuts in the oven until fragrant and a bit brown. Keep an eye on them towards the end so they don't get too dark.
- Chop the walnuts coarsely.
Bulk fermentation
- Over the next 1½ hours, you should stretch and fold the dough every 30 minutes (watch the video for details).
- During the second set of stretch and folds, you should include a quarter of cranberries (remember to drain the bourbon) and a quarter of the walnuts for every stretch and fold. After this second set, you can do a bit of Rubaud mixing to make sure they're properly mixed in.
- After the third set, check the gluten development using the windowpane test. If the dough fails, add another set after 30 minutes and then go on.
- Then add the entire dough to a see-through container with straight sides.
- Level the top of the dough.
- Mark the top of the dough on the outside of the container using a whiteboard marker.
- Then mark where the dough will have increased by 25%. If you use a measuring tape, measure from the table to the top. Divide that number by 4. Measure from the top and up by the calculated number, and put your mark here.
- Let the dough grow by 25%. I usually put the dough in my proofer set to 30°C/86°F.
Divide and shape
- When the dough has grown, divide the dough into two equally sized pieces.
- Shape the balls into the style of bread you prefer. I prefer bâtards, but boules can be beautiful too. I show how to shape both in the video.
- Put the shaped bread in each of their bannetons. If you are using a banneton liner or a dishtowel in the basket, you don't need to do anything special.
- If you use the proofing basket, you need to flour the banneton. I do it this way: I spritz the banneton lightly with water, then flour it with rice flour.
- Then put them into the fridge for at least 8 hours, but up 48 hours. Your fridge must be set cold. I have my refrigerator set to 2°C/36°F.
Baking
- When ready to bake, turn your oven to 260°C/500°F with a baking steel and a dutch oven inside. You should heat your steel and dutch oven for an hour to ensure complete heat saturation.
- Grab the first dough from the fridge. Flour the bottom with rice flour to help it slide off the peel.
- Flip the dough onto the peel and score the dough with a lame or sharp kitchen knife.
- Remove the lid from the dutch oven.
- Put the dough into the bottom of your dutch oven. If you use a combo cooker or the Challenger Bread pan, this can be a lot easier.
- Put the lid back on the dutch oven, close the oven and bake for 20 minutes.
- Then take the lid off the dutch oven and turn down the oven to 230°C/450°F.
- Bake for another 25 minutes until the bread is delightfully golden and crispy.
- Then take the bread out of the oven to cool off on a wire rack. Let it cool for a couple of hours until the inside of the bread has reached room temperature.
- Bake the other bread the same way.


