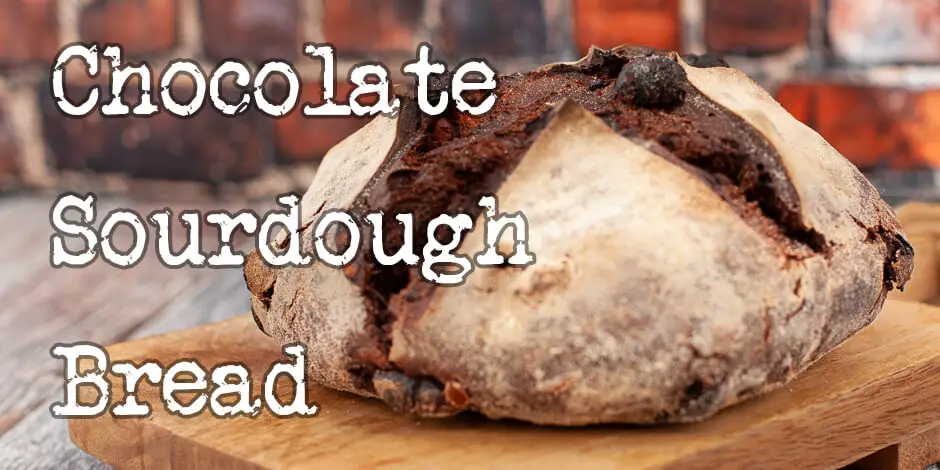
Sourdough has become a slight obsession of mine. I’ve noticed that it’s common for people who get into sourdough to get wholly engulfed in working their starters (Tamagotchi, anyone?) and baking delicious bread. Sourdough bread is much healthier than your average store-bought bread and a hundred times tastier. Typically these bread are your typical “bread and butter” types of bread, but I’ve started branching out into the world of add-ins and changing the flavor overall. This is my recipe for chocolate sourdough bread.
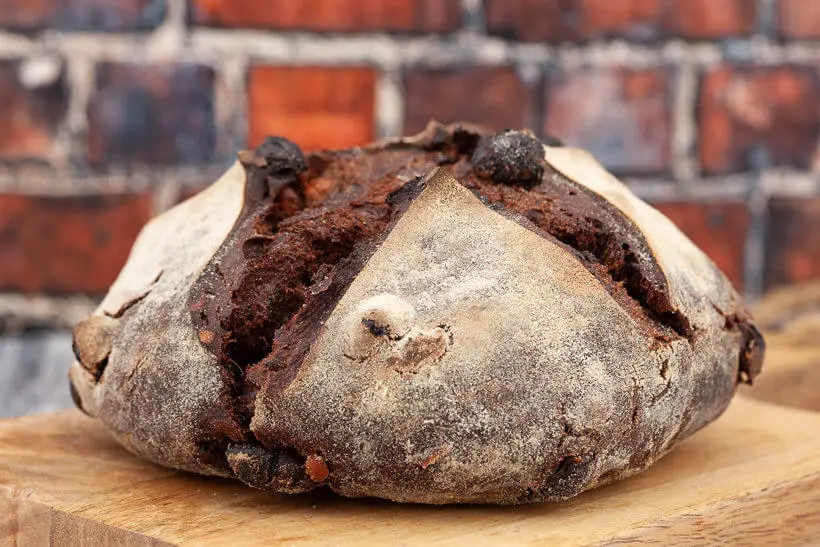
Sourdough bread is usually something you’d think of as tangy, not sweet, but this bread takes the whole taste experience in the other direction. The crumb is dark and chocolaty, with specks of chocolate pieces, sweet Cointreau-soaked raisins, and crunchy and very nutty hazelnuts. You get a cakey vibe, but it’s not sweet at all.
If you are just here for the recipe, you can press the button underneath to be automagically transported to the recipe:
Jump to Recipe Jump to VideoYou can eat it all by itself or with some beautiful butter on top. I feel like a slice of strong cheese suits the flavors.
To make this bread, you will need an active sourdough starter. You can follow my guide here to make your own.
If you don’t want to use alcohol, I understand that. The Cointreau is orange-flavored so you can substitute it with orange juice. Easy peasy.
The formula in this chocolate sourdough bread recipe
Vitals
| Total weight | 2062 grams |
| Pre-fermented flour | 10.6% |
| Hydration | 75% |
| Yield | 2 small loaves |
The dough
The dough’s hydration is 75%, but because of the added cocoa powder, it’s a pretty stiff dough. I like the crumb to be relatively tight on this bread so that the add-ins don’t just fall out of the bread when you cut a piece.
| Weight | Ingredient | Baker's Percentage |
|---|---|---|
| 658g | bread flour | 81.8% |
| 146g | spelt flour | 18.2% |
| 579g | water | 72% |
| 18g | fine salt | 2.2% |
| 72g | brown sugar | 9% |
| 72g | cocoa powder | 9% |
| 27g | honey | 3.4% |
| 100g | Foodgeek Chocolate 70% Muscovado | 12.4% |
| 100g | hazelnuts | 12.4% |
| 100g | raisins | 12.4% |
| 190g | starter (100% hydration) | 23.6% |
If you want to play around with the recipe or change the hydration, you can do that in my bread calculator.
The conclusion of this chocolate sourdough bread recipe
This bread is a different beast but delicious and doesn’t seem like anything else I’ve tried before.
Like regular sourdough bread, the crust is super crunchy, and the crumb is soft and somewhat stretchy.
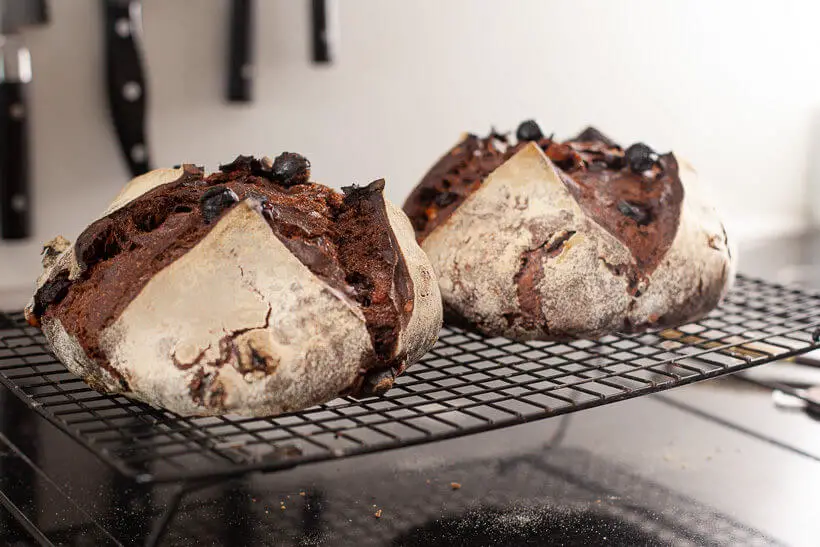
The different tastes are perfect: dark, earthy, and fruity notes from the chocolate, soft, plump orangy raisins, and the nuttiest hazelnuts with a beautiful crunch that gives the bread an excellent texture breakup.
It’s no more complicated to make than any other sourdough bread, and it would be excellent as a snack or for a dinner party, maybe as a course before the dessert. People will be amazed by it.
Please share on social media
This is my recipe for chocolate sourdough bread. I hope you will try to bake it. If you bake it and post it on Instagram, please tag me as @foodgeek.dk so I can see your creations. That will make me happy.
Ad links! The links for equipment and ingredients in this recipe are affiliate links, which means I will receive a commission if you purchase the product.
Chocolate Sourdough Bread
Ingredients
Dough
- 658 g bread flour
- 146 g spelt flour
- 579 g water divided
- 18 g fine salt
- 72 g brown sugar
- 27 g honey
- 72 g Valrhona Cocoa Powder Dutch process cocapowder
Add-ins
- 100 g dark chocolate
- 100 g hazelnuts
- 100 g raisins
- 50 g Cointreau substitute with orange juice
- 190 g sourdough starter fed and grown to its peak
Instructions
Autolyse – in the morning
- Mix bread flour, spelt flour, and cocoa powder in a bowl.
- Add all but 50 grams of the water to the flour mixture.
- Blend everything so that all flour is hydrated. The mixture can be a bit stiff, so knead it lightly if needed.
- Cover with a wet dishcloth until needed.
Ready the raisins – in the morning
- Add the raisins to a small bowl.
- Pour over Cointreau and leave until you need it.
Remove skins and toast hazelnuts – in the morning
- Turn the oven on to 180°C/400°F/Gas Mark 4.
- Add 3 tbsp of baking soda to 1 liter of water and bring it to a boil.
- Turn the heat down to a simmer.
- Add the hazelnuts and simmer for 3 minutes. Pour off the (black) water into a strainer.
- Remove all the skins by pressing each hazelnut so the skin pops off.
- Once you've removed all the skins, dry off the nuts in a clean dishtowel.
- Add to a small pan and toast in the oven for 15 minutes.
- Remove the hazelnuts from the oven and add them to a small bowl to cool. Once cooled, chop them very coarsely.
Mix the dough – around noon
- Add salt, honey, brown sugar, and 50 grams of water. Combine it lightly by folding it a bit. Then add the starter and incorporate everything.
- It may take a while because the dough is stiff, so take your time and ensure everything is incorporated.
- Leave the dough to rest for 30 minutes.
Mix in the add-ins – about 12:30/12.30 pm
- Wet your hand and lose the dough from the bowl.
- Drizzle about half of the hazelnuts on top of the dough and do a couple of stretch and folds to incorporate.
- Pour the rest of the hazelnuts on top, stretch, and fold a couple of times again.
- Chop the chocolate coarsely and spread it over the dough. Stretch and fold a couple of times.
- Repeat with the raisins, making sure to discard any left-over Cointreau.
- Leave the dough to rest for 30 minutes.
Bulk fermentation – about 13:00/1.00 pm
- We will be doing three sets of stretch and folds every 30 minutes.
- First, wet your hands and loosen the dough from the sides of the bowl.
- Then grab the back of the dough with one hand. Stretch the dough as far as it goes without breaking, and then fold it down.
- Turn the bowl a quarter and repeat thrice until you have stretched and folded the dough from all four sides.
- Leave the dough to rest covered until the next 30 minutes are up.
- After the three sets of stretch and folds, you can try a windowpane test to see how strong the gluten network is, but it can be tricky because the add-ins might cut the pane. The autolyse should have made sure that gluten is adequately developed.
- Leave the dough to rest until it's grown by 25-50% and looks puffier. It usually takes 2½ hours at 21°C/70°F with a good and active starter, but judge your dough.
Divide and preshape – about 15:30/3.30 pm
- When the dough has finished bulk, it's time to divide and pre-shape it.
- Pour the dough onto your unfloured kitchen counter.
- Using your bench scraper, cut the dough into two equally sized pieces.
- Put one part of the dough to the side.
- Grab the other part, stretch each of the four sides out, and fold it over the dough—like an envelope.
- Grab the dough with your bench scraper and flip it upside down so the part facing the table is now upwards.
- Put your bench scraper behind the dough and pull it forward over the table so that the front of the dough is pulled down underneath the dough ball. You can use your other hand to guide the dough.
- When the dough ball can't get any further, put the bench scraper in front of it and push it forward while turning it around so that you end up behind the ball again.
- Keep going until the dough ball has a taut surface.
- Repeat with the other piece of dough and leave them to rest on the counter for 20 minutes.
Shape the dough – about 16:00/4.00 pm
- Start by flouring your bannetons liberally with rice flour.
- Once the 20 minutes are up, you should shape the dough.
- Follow the instructions for the preshape, and once the dough is shaped. Flip it upside down into the floured banneton.
- Put the banneton in a plastic bag and place it in the fridge overnight.
- Continue with the other dough ball.
Bake the bread – next morning
- If you have a baking steel or a pizza stone, place it on a rack in the lower middle of the oven. Place a dutch oven or combo cooker on top.
- Preheat the oven to 260°C/500°F/Gas Mark 10 (or Gas Mark 9 if unavailable).
- Preheat for a good hour to ensure everything is hot for the bake.
- Take a banneton with a boule from the fridge.
- Flip it out onto a peel covered with parchment paper.
- Add extra rice flour to that the surface is completely covered.
- Score the bread. I like to do a big cross on this bread because of the way it opens up but pick your favorite. It doesn't affect the taste of the bread.
- Open the oven. Put the bread in the dutch oven by pulling or carrying the bread over. Put on the lid and close the oven.
- Bake for 20 minutes covered.
- Turn down the oven to 230°C/450°F/Gas Mark 8.
- Open the oven and remove the top of the dutch oven. If you have room in the oven, you can keep it there, but I usually place it on my stove until I need it again.
- Close the door and bake for another 25-30 minutes. Don't worry if the bread gets dark around the edges. It's a good sign.
- When the bread is done, take it out and place it on a wire rack to cool.
- Continue with the other bread by reheating to 260°C/500°F/Gas Mark 10.
- Put the top of the dutch oven top back in the oven; bake the other bread when the oven is hot.
- Let the bread cool completely before you cut into them.


